
When crafting a perfect Peach Crisp, you’ll find that the balance between the sweetness of the ripe peaches and the crunchy oat topping is key. You don’t have to be a professional chef to pull off this delightful dessert, but a few tips can elevate your dish to the next level. Should you use fresh or canned peaches? Does the type of sugar in the topping make a difference? These considerations might change how you approach your Peach Crisp, and there are some surprising details you might not expect.

Table of Contents
Key Takeaways
- Use fresh or canned peaches, peeled, pitted, and sliced for the base.
- Combine flour, brown sugar, butter, cinnamon, and salt for the crispy topping.
- Bake at 350°F for 30 minutes until the topping is golden brown.
- Serve warm with vanilla ice cream or whipped cream for added flavor.
- Store leftovers in an airtight container in the fridge or freezer.
Ingredients

You’ll need fresh peaches, flour, sugar, cinnamon, oats, and butter to make a delicious peach crisp. Start by gathering the main ingredients for the recipe. The peaches are the star of your crisp, so make sure they’re ripe and juicy. You’ll need about six to eight medium peaches, peeled, pitted, and sliced.
For the topping, combine flour, oats, and brown sugar. The oats add a delightful crunch, and the brown sugar gives the topping a rich, caramel-like flavor. Mix in a bit of cinnamon to enhance the sweetness of the peaches. Don’t forget the butter; it helps create a golden, crispy layer.
Sprinkle the peaches with granulated sugar and lemon juice to brighten their flavor. Layer them evenly in your baking dish. Spread the topping mixture over the peaches, making sure it’s evenly distributed.
Once baked, the peach crisp will have a beautiful, bubbling fruit layer and a crunchy, golden topping. Serve it warm, and don’t forget a scoop of vanilla ice cream to complement the sweet, tangy peaches. Your taste buds will thank you!
Fresh Vs. Canned Peaches
When deciding between fresh and canned peaches for your crisp, consider the time of year and the convenience factor. Fresh peaches are bursting with flavor and are ideal during peak season. They bring a vibrant and juicy touch to your peach crisp recipe, making it a standout summer dessert. However, if you’re looking for an easy and quick option, canned peaches are a practical choice. They can be used year-round without compromising the taste and texture.

| Aspect | Fresh Peaches | Canned Peaches |
|---|---|---|
| Flavor | Best during peak season | Consistent year-round |
| Preparation Time | It may require peeling and slicing | Ready to use |
| Juiciness | It is very juicy and adds vibrancy | Juicy but more uniform |
Whether you choose fresh or canned peaches, both can be used interchangeably in your peach crisp recipe. Fresh peaches will give you that extra juiciness, while canned peaches make the process more effortless, especially when you’re short on time. Using a pastry cutter, you can create a golden brown topping that complements the juicy peaches perfectly. So, the choice depends on your preference and the season.
Preparation Steps
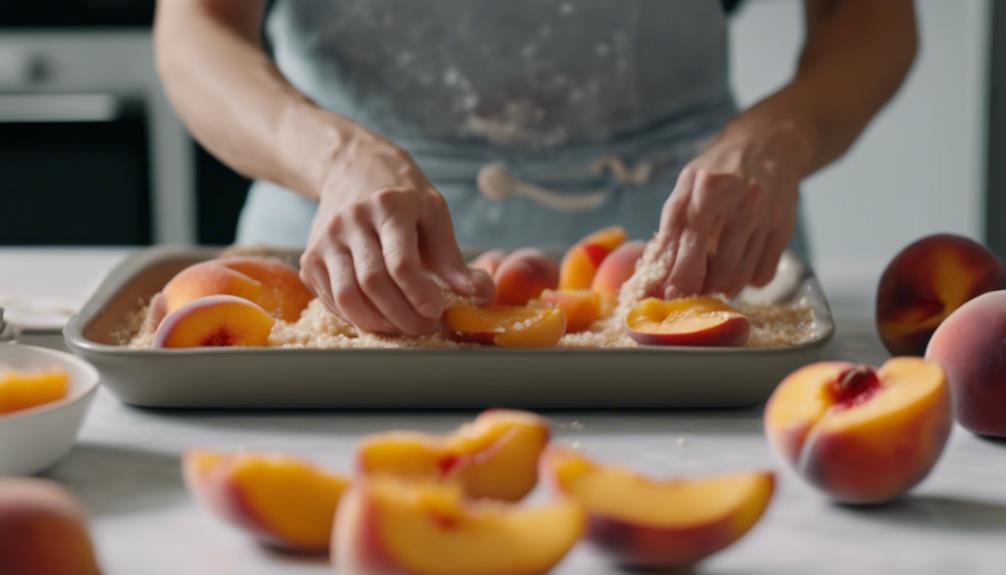
Start by preheating your oven to 350 degrees F (175 degrees C) to ensure the perfect golden brown topping and bubbling peaches.
Next, prepare the crumbly topping. In a mixing bowl, combine flour, brown sugar, butter, cinnamon, and a pinch of salt. Use your fingers or a pastry cutter to blend the ingredients until they resemble coarse crumbs. This topping adds a delightful crunch to your peach crisp recipe.
Now, slice your peaches and arrange them evenly in a baking dish. This ensures that every bite has the perfect balance of fruit and topping.
Once the peaches are spread out, sprinkle the topping mixture, pressing lightly to adhere it to the fruit. This step is crucial for creating that irresistible layer that crisps up during baking.
With everything assembled, your peach crisp is almost ready for the oven. The bake time is about 30 minutes, so plan accordingly.
You’ll know it’s done when the topping is golden brown, and the peaches are Bakingbbling at the edges, signaling a delicious, perfectly baked dessert.
Baking Instructions
Place the prepared peach crisp in the oven and bake for about 30 minutes. For best results, make sure the oven is set to 350 degrees F (175 degrees C).
As the peach crisp bakes, the fragrant aroma of the peach slices mingling with the crumble topping will fill your kitchen.
Keep an eye on your peach crisp recipe as it bakes. You’ll know it’s ready when the crisp topping turns a beautiful golden brown. The filling should also be bubbling around the edges, indicating that the peaches are cooked through and the flavors have melded together perfectly.
For the best texture, ensure the crisp topping is evenly spread over the peach slices before putting it in the oven. Press down lightly on the topping to adhere well and form that signature crisp texture. This step ensures every bite perfectly balances juicy peaches and crunchy topping.
Once the topping is golden and the filling is bubbling, carefully remove the peach crisp from the oven. Let it cool slightly before serving to allow the flavors to develop fully.
Enjoy your delicious homemade peach crisp!
Storing Tips

To keep your peach crisp and fresh, use an airtight container or cover it tightly with plastic wrap.
It can last up to a week in the fridge or two months in the freezer.
When reheating, bake it at 350°F for 15 minutes to enjoy it warm again.
Optimal Storage Containers
Airtight containers, like glass or plastic storage options, are crucial for keeping your peach crisp, fresh, and delicious. When selecting storage containers, avoid using aluminum foil or plastic wrap directly on the surface of the peach crisp. These methods can lead to moisture buildup and affect the texture and taste of your dish.
Instead, opt for containers with lids to maintain freshness and prevent moisture from ruining your dessert.
Before placing your peach crisp in a storage container, make sure the container is clean and dry. This helps to prevent any contamination that could spoil your treat. Labeling the container with the date of preparation is also a good idea. This way, you can easily track how long your peach crisp has been stored, ensuring you enjoy it at its best.
Shelf Life Tips
Storing your peach crisp correctly guarantees it stays delicious and safe to eat for as long as possible. After you’ve enjoyed your fresh peach crisp, store it properly to extend its shelf life.
Start by allowing the crisp to cool completely. Once cooled, cover the baking dish tightly with a lid or plastic wrap. For extra freshness, place a loose-fitting but secure sheet of plastic wrap over the dish before sealing it with the lid. This guarantees that your dessert stays moist and flavorful for up to a week in the refrigerator.
If you want to store your peach crisp for a longer period, freezing is an excellent option. Transfer the cooled crisp to a freezer-safe container and seal it tightly. You can freeze it for up to two months.
When you’re ready to enjoy it again, there’s no need to thaw. Reheat by baking the frozen peach crisp in a 350°F oven for about 15 minutes. These shelf life tips ensure that every bite of your peach crisp recipe remains as delightful as when it was first made.
Freezing Guidelines
For best preservation, freeze your peach crisp in a sealed container or freezer-safe bag for up to two months. First, make sure your peach crisp has cooled completely. Then, cover the baking dish with plastic wrap before sealing it with a lid to maintain freshness and prevent freezer burn.
If you have leftover peach crisp, store it in the refrigerator for up to a week.
When you’re ready to enjoy your frozen peach crisp, transfer it from the freezer to the fridge and let it thaw overnight. This slow thawing method helps maintain the texture and flavor.
Once thawed, reheat the peach crisp in a 350°F oven for about 15 minutes until it’s warm and bubbly.
Serving Suggestions

Now that your peach crisp is perfectly baked or reheated let’s explore some delightful serving suggestions to elevate your dessert experience. Serving warm is key to enhancing the flavors and textures of your peach crisp recipe. Here are some ways to make your dessert truly unforgettable:
- Top with a scoop of vanilla ice cream: The contrast between the warm peach crisp and cold ice cream creates a delectable combination. The creamy texture of vanilla ice cream complements the crispy and juicy elements of the peach crisp.
- Add a dollop of whipped cream: A generous dollop of whipped cream can do wonders for a lighter, airy topping. It adds a touch of sweetness and a creamy texture that pairs perfectly with the warm peach filling.
- Pair with iced tea or lemonade: A refreshing beverage like iced tea or lemonade can balance the richness of the peach crisp. The cool, crisp drinks provide a delightful contrast to the warm dessert.
- Garnish with fresh mint leaves and drizzle with caramel or honey. Fresh mint leaves add a pop of color and freshness. Drizzling caramel or honey over the top adds an extra layer of sweetness, making each bite more indulgent.
These simple touches can transform your peach crisp into a memorable treat.
Reader Reviews
Readers rave about the peach crisp recipe, praising its simplicity and delightful taste. Many appreciate how easy it’s to make, even for those who aren’t typically fans of peaches. The straightforward steps and minimal ingredients make this recipe a favorite among novice and seasoned bakers. Its high rating of 4.98 out of 5 speaks volumes about its popularity.
One common suggestion among reviewers is to serve the peach crisp warm with a scoop of vanilla ice cream. This combination elevates the dessert to a new level, making it irresistibly delicious. The warm, gooey peaches paired with the crispy topping and the creamy ice cream create a perfect harmony of flavors and textures.
The peach crisp recipe’s simplicity is a major selling point. Reviewers highlight that you don’t need any special skills or equipment to whip up this delightful dessert. It’s quick to prepare, making it an excellent choice for last-minute gatherings or a spontaneous sweet treat.
Conclusion
You’re all set to make a mouthwatering peach crisp to impress everyone. The steps are simple, whether you use fresh or canned peaches.
Follow the preparation and baking instructions closely; you’ll get a golden, bubbling dessert.
Don’t forget to store or freeze any leftovers properly. Serve it warm with vanilla ice cream or whipped cream for a perfect treat.
Now, it’s your turn to indulge and enjoy this delicious dessert!
FAQs
1. What Is the Difference Between a Peach Crumble and a Peach Crisp?
The main difference is in the topping texture: Crisps use oats, while crumbles don’t. Consider ingredient variations, like sugar alternatives or spices. Explore different peach varieties, baking techniques, serving suggestions, and vegan or gluten-free adaptations.
2. Why Is My Peach Crisp Soggy?
Your peach crisp might be soggy due to overripe peaches releasing excess liquid, a thin topping, inadequate baking, or using the wrong flour. For a crisp texture, make sure to use fresh, juicy peaches and ventilate the baking dish.
3. Is It Better to Freeze Peach Crisp Before or After Baking?
It would be best to freeze it before baking it for better peach quality and crisp texture. Proper freezer storage and thawing process guarantee flavor retention. Easy prep and baking tips, like adjusting oven templating, help maintain the peach variety’s natural taste.
4. What Is the Difference Between a Fruit Cobbler and a Fruit Crisp?
The difference between a fruit cobbler and a fruit crisp lies in the topping variations. Cobblers have a biscuit-like topping, while crisps have a crumbly topping made from flour, sugar, and oats. Consider nut additions and spice blends.